How to workout for busy people – strength focus

On this second post of the How to workout for busy people series I want to focus on developing strength on a “time-budget”. Part one here

Strength = skill = practice

Why is strength so effective to develop when tight in time? Because strength is a skill. It’s the skill of building tension in the muscles, and every skill gets better the more we practice (of course, practice correct form, cues, etc.). If we tone it down, if you want to press more you’ll have to press more. If you practice more while well rested you’ll get a lot better a lot quicker.

Minimal approach works best

If you’re short on time you don’t want (or can’t) be in the gym, or your garage for long periods of time. So pick 2 to 4 exercises total. And practice them, really nail them down. Take this forced focus to get the most out of these exercises.

So, what’s the recepie for busy people anyway?

You’ll go to a HFT type of work. High frequency and intensity, with low volume (remember, a little every day goes a long way). Pick 2-4 exercises and practice them 3-5 times a week, and do 2-3 sets of 3-6 reps. The more you practice them, the better the results we’ll be at the end.

So, here are a couple of suggestions:

Barbell

Over head press (strict): 2 x 5 with a load you can manage 7 reps solidly. Rest 2-3 minutes between sets. Add weight after every second session that you nail the 2×5.

Deadlift: Same. 2×5 with a load you can manage 7 reps solidly. Rest 2-3 minutes between sets, adding weight after every second session that you nail the 2×5.

Squats: Follow the same protocol. Squats should be alternated with deadlifts (one session each) if you’re going to do them.

You can never go wrong working on the deadlift. Probably THE most complete excercise and importante exercise for busy people

You can never go wrong working on the deadlift. Probably THE most complete excercise and importante exercise for busy people. Photo by Amber Karnes

Kettlebells

A1) TGU: 2 x 1, 2, 3, 4, 5 reps. Start with 2 x 1, 2, 3 and add one rung to the ladder every second session you manage the alloted number of rungs.

A2) Goblet Squat: 2 x 1, 2, 3, 4, 5 reps. Start with 2 x 1, 2, 3 and add one rung to the ladder every second session you manage the alloted nmber of reps.

Go back and forth between this two resting as needed.

B1) Kettlebel Swings: 50-100 reps total. Keep it easy and don’t exhaust yourself with this. It’s just to finish up!

Bodyweight

Push up variant or Dip: 2 x 5

Pull-up or Row: 2 x 5

Squat: 2 x 10

Leg Raises: 1 x 10

Do this in a circuit fashion. Rest 2 minutes between circuits. And do these exercises like you mean it. Once you feel they’re two easy try a new, hard variant.

Now, that you’re not busy enough, what’s your excuse?

Motus Virtute

How to workout for busy people

One thing I regret not doing in the last couple of years is not recording the excuses friends and family have been giving me to not workout. Of course “I don’t have time” is the most common excuse (and “I don’t want to” often the rarest). Most of us know this isn’t true. But what happens when our schedule isn’t going in our favor? Most of us are, after all, busy people.

What happens when time derails?

Usually (and I’m sure you can relate), I’ve got time to work, workout, write this blog, meet with friends, … and even read a

No time to workout

Some aspects of life will get in the way! Photo by Giuseppe Savo

book before bed, getting around 7-8 hours of sleep and feeling happy. But, as I’m sure it has happened to you, sometimes things just won’t fall in place, social life demands more time, work demands more time, and of course, we sacrifice those things that aren’t really a priority, we’re after all, busy people. In most cases (most certainly mine), fitness goes out the window. And this has happened to me during finals, heavier working periods, etc.

Of course, during those moments I didn’t know what I now know. And, being mindful of these things I do have a couple of back-up plans that respond to my goals for such times. I’ve decided I would always have time to practice, so, I’ll practice even in the event of having little time.

In this post, I wanted to share with you these “principles” I keep in mind to build short time effective workouts.

5 Rules for busy people!

Keep your goals in mind!

This is very important, since you’ll have to make decisions based on this.

Cut the fat

Pareto’s principle states that 20% of the efforts deliver 80% of the results. Lean your routine, simplify. What doesn’tbuild to your goals needs to go (this will be temporal after all).

A little every day goes a long way

There’s no reason why you can’t divide your workouts to “a little every day”. Grab your training journal and estimate

Pistol squats: great for busy people looking for a complete leg workout in an exercise

Working out in your apartment is a great time saver for busy people. And the pistol squat are great for a complete leg workout in an exercise

your total weekly volume of those key exercises that lead to achieving your goals. Divide this by 5 or 6, you’ll have a daily goal of sets that you can probably manage better, and in shorter time!

This also works for conditioning

Remember to enjoy it!

Most excuses come in the form of “I don’t have time for that”, when they really mean “I couldn’t give two tugs of a (for the rest, read Metropolitan (awesome comic))”. You’re workout won’t always be fun and you won’t always be motivated. But, if it’s a chore it will be a lot harder to pull off.

Keep it temporal

This is a great strategy to employ in moments of little time. But they can get boring. So, unless you fall in love with this type of training (as I have, and miss it), keep it only for moments that you have to rush it (like finals, life with kids, etc.).

What are the weirdest excuses you’ve heard? Post them in the comment section so we can all have a laugh!

Next post will be featuring a couple of workouts with this in mind, so if you have any particular time restriction, be sure to let me know so I can feature something factoring it!

Motus Virtute!

Why use kettlebells and 2 workouts

Far from still being the underground turned culty fitness tool that it was half a decade ago, KBs have come into the mainstream. There’s a lot said about how and when to use this tool, and their apparant benefits. All this aside, what I’m happiest about is, I no longer have to describe a cannonball with a handle, most everyone knows what it is.

Why use Kettlebells

The kettlebell is, in my opinion, one of the best tools out there for overall fitness for the everyday Joe and Jane. Kettlebells can and will help you develop

  • Strength: this are the grinding movements

    Kettlebell clean, kettlebell military press, strength training with kettlebells

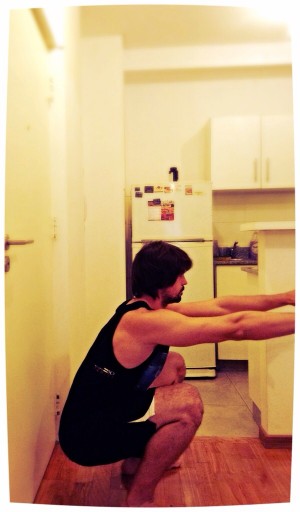
    Clean the kettlebell strongly, else you’ll bang up your forearm! – Photo by Ken Liu

  • Conditioning: through repetitive ballistics
  • Flexibility: if used wisely
  • Power: Through heavy ballistic excercises
  • Mobility: think windmills and TGUs.

Are they the best tools for each job. Hell no. But they’re good for the development of an all around athlete/enthusiast. And, they’re very easily integrated with other tools.

(I could get into more detail about the advantages of practicing the hip drive or how all these attributes can be trained. But that’s a subject for a book, and not a blog post)

Disadvantages of kettlebells (why not use kettlebells)

They’re not a specialist’s tool. If you want to be the strongest or the most powerful, you can’t beat a barbell. You want to be the most flexible, yoga is your tool. You want to be the best at anything, there are appropiate tools that will let you specialize in each: endurance, flexibility, mobility, strength, hyperthorphy… All can be improved with a KB, but no to the same level as.

So, Why use kettlebells then?

Kettlebells will give you a blend of strength, endurance and power that can’t really be described as “strength-endurance” or “power-endurance” but more as an: ease of being. Having practiced on and off with kettlebells (sometimes my goals are more specialized) I can attest to the fact that any regular task gets easier (like playing football(or soccer) for about two hours with legs that just won’t quit), that joint health increases, and that the grass gets even greener (ok, maybe not that much).

In other words, unless you’re focused on a particular sport, kettlebells are probably the right tool for you.

The Workouts

1) KB solo

This an beginner to intermidiate plan and should be done 3 or 4 times a week. Please keep your recovery in mind. It has an all around focus (if you want to go more frequent, change the number of sets to 3). Don’t ever go to failure!

A1) TGU 3×3

Rest 1-2 minutes between sets. Go heavy, but never to failure.

B1) Clean + Military Press 5×5

B2) KB one arm row 5×5

Rest one minute between each excercise

Kettlebell swing

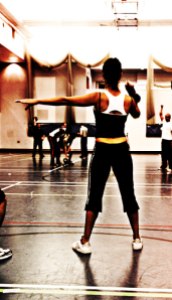
Expect a healthy sweat! Photo by John Calnan

C1) Goblet Squat 5×5-10

C2) Heavy KB 1H Swings or Snatches 5×5

Rest one minute between each excercise.

D1) Kettlebell 2H swings 5x 15-20

Rest 30″ to 1 minute between sets. Jog in place or jump an imaginary rope.

After this have a cool down with stretches and some mobility work for recovery.

2) KB + Bodyweight

This is an all arounder that will hit each and every movement pattern in the most effective way I know of. Do this 4 times a week.

Day 1

A) TGU 3×3 (can’t beat this baby)

Go heavy. But never to failure. Rest one or two minutes between sets.

B1) KB Clean + Press 5×5

B2) Pullup progression 5×5 (pick one you can do up to 8 reps barely). If this is your pull-up, weight them!

Rest 1 minute between excercises

C1) Goblet Squat 5×5

C2) 1H heavy swings 5×5

Rest one minute between excercises.

D1) Burpees 5x as much as you can with perfect form (I don’t care about speed here, just go as fast as you can while remaining as controlled as you can).

Day 2

A) Handstand holds 3x 50% of your max holding time.

Keep your body straight (or better yet, face the wall and touch it with your chest). Rest one or two minutes between each set.

B1) Push-up progression (or dips) 5×5

B2) KB Row 5×5

Rest 1 minute between each set

C1) Pistol Squat progression 5×5 (use a progression you can do about 8 perfect reps, but not 9)

C2) KB Snatch or 1H heavy swing 5×5

Rest 1 minute between each set

D1) Kettlebell 2H swing 5x as many as you can with perfect form and a solid hip drive.

After you finish each workout, cool down with some stretches and mobility work for recovery.

Conclusion

If you can use them, Kettlebells are a great addition to any fitness program, just be mindful of what your goals are and what you’re looking for. If you want to be a specialist, then the KB is probably not your cuppa. If, on the other hand, you’re looking for all around development to above average, but not elite levels, then by all means, go buy the damned thing!

Shameless advertising bit – where I learned most of kettlebells from

Why use kettlebells

One of the best damn books to get you started, and then some

To finish this post off I’d like to share with you where I learned most kettlebell skills and probably the most important book to have in a kettlebell library. The Russian Kettlebell Challenge (affiliate link). by Pavel Tsatsouline is a golden oldie. Even though there have been several other great books by the same author (Enter the Kettlebell and Simple & Sinister to say the least) this one I believe is the most complete of the three, the only lacking part I found is: there’s no information on the TGU (which later became a staple in both his certifications, and an exercise that one must simply do).

*Note: all the above links are from affiliate programs and will lead you either to Dragondoor or Amazon product pages. Just FYI.

Motus Virtute

Frequency + Volume + Intensity: a love triangle

One of the main questions I see in forums, twitter, and facebook when talking about programming is always the same: how often can I workout? The answer to this is always the same: it depends. To effectively answer how frequently you may do it, we should first know how hard, and how much we’ll be doing it.

It all boils down to our love triangle

Intenisty, Volume, Frequency, Training, workout, fitness

Now pick two

Now pick two

Yes, pick two. Barring enhancers, there’s no human way and amateur will be able to sustain a high volume, high intensity, high frequency training regime without burning out sooner rather than later. So you get to pick only two.

Intensity + Volume = High Intensity Training

This is the most common choice we see in most routines. Go tough one time a week. Obliterate the muscles with as much as they can take (think lifting heavy) for as long as they can take it (mid-high sets with low-mid reps). This is what most bodybuilding splits come from: leg day is around 12 sets for the legs in every which way (squats, machines, etc.) till you need a wheelchair to get out of the gym. You’ll be doing this again in around 5-7 days. Next time you go to the gym you’ll obliterate your chest or your arms or your back. You can even go every day to the gym without really upping your frequency.

Think of things you can only do once or twice a week: bodybuilding split, sprints, HIIT, etc.

Intensity + frequency = High frequency Training

This is my absolute favorite. You get to go heavy and often. Think programs likeGTG,PTTP or among the lines. You do a

Deadlift, strength, intensity, volume, frequency, workout, fitness, training

Nothing builds strength and power as a good and heavy Deadlift. Nothing builds injuries as a good and heavy Deadlift done for reps too often. Photo by Tom Woodward

small amount of heavy work with a lot of rest every day (or 5 days a week). Your CNS gets fried, you get no pump but plates in the barbell just keep adding up like crazy. Remember, there’s no going to failure in this scheme.

Think along the lines of strength practice: GTG, PTTP, Pavel’s 40 day workout, most things written by Dan John

Volume + frequency = Endurance work

You won’t be going heavy (remember, heavy depends a lot on the persons capacities, some may think a 300 lb DL is an easy feat, others may feel it’s impossible), so you can take your reps to the higher numbers. Of course, being a high frequency type of training, there’s no way you can go to failure either without really compromising your performance for your next session. Think about someone who goes for a run every day, or someone who walks everywhere or uses his bike to go to work. You’re putting a heck of a workload every day, but it’s a light workload, so you should be able to recover well from practice to practice.

Thin along endurance training, or recovery. I don’t really know much here to give you many details.

How to pick

Think about your goals first.

Are you going for strength? size? endurance? power? Then you pick what best suits you and your way of life. There’s no reason to lie to yourself saying you’ll be doing this every day if your life will get in the way by day 3. You can get strong, big, lean and conditioned with any of the three picks.

 What works best for what:

  • Intensity + Volume: Conditioning + Hypertrophy + Strength
  • Intensity + Frequency: Strength + skill development
  • Volume + Frequency: Conditioning + endurance + flexibility (yep, yogis were right)
  • Diet: Fatloss (sorry, there’s no other way around it)

So take your pick!

Motus Virtute

PS: Studies show that the Nº1 way to be awesome is following this blog (just sayin’).

5 reasons your workout should match your lifestyle

Fitness writers, whether they are professionals or amateurs (such as me), enthusiasts or internet gurus, have been telling people how to train, and why they should workout the way they/we say in complete disregard to their lifestyle. To add more to the confusion, they’ll not only tell you how to train, but will offer a myriad of exercises that can (and should) take your brain into meltdown.

I’m calling bullshit.

I do, even though I tell people how they should train as well, giving them ample reasons as to why. Is this wrong? Not necessarily. Are you going to fail reaching your goals? Probably not. Why? Most things will and should work, as long as you know what and why you’re doing them and you keep all other things in context.

Why your workout should meet your lifestyle

1. You’ll have fun

I think this is self explained. You’re not a pro, and seriously, doing something that enriches your life should not be a chore (unless prescribed by a doctor. Health professionals trump everything). Your workout should be challenging, fun and motivating.

Bottom line: your life’s probably hard enough without adding crap. Do something that makes you happy!

2. It’s a personal thing

Skateboard, fun workout, personal workout, relax

Yep, definetly needs grip work!!
Photo by Raul Gomez

Your goals are your own. And you should train to achieve them, you shouldn’t train to achieve what someone else says your goals should be. We may help you design goals in a way that are clear (example: you should define what being fitter means. To you it may mean running 25k in record time, it may mean to jog for 1 hour straight), and help you build towards them.

Bottom line: If you want to look better, GO FOR IT, it’s a completely legit aspiration. Personally, I’ll be getting stronger instead.

3. It will make you consistent

You should be looking forward to your workout. If it feels you with dread or boredom, it won’t be long until you start making excuses not to show up. If there’s anything I learned from my father regarding training is this: THE BEST PROGRAM IS THE ONE YOU’LL ACTUALLY DO (to which I add: in the long run).

Bottom line: enjoying your training will make you look forward to it. Not enjoying it will make you quit

4. It will connect you with like-minded people

As you get better and more exposed to an activity, chances are bigger that you’ll meet like-minded individuals that will motivate you even further. If, for example, I start talking about bouldering to a swimmer, 10 to 1 says he’ll be looking at me with glazed eyes feeling somewhat bored. If I talk about bouldering to a climber, chances are we’ll exchange ideas, tips, and maybe even go bouldering or climbing together at one time or another.

Bottom line: there’s probably many people doing what you enjoy. Joining them will compound results!

5. You’ll have fun

I said this already but it bears repeating. If you’re not enjoying yourself, you won’t be doing it for long.

In a nutshell

There you go, 5 solid reasons why your workouts should match your lifestyle. Train what you enjoy, have fun, and be happy. Chances are there’s enough bull around for you to waste time doing more on purpose.

Now I’m going to go back to suggesting what you should do.

Motus Virtute

Bodyweight strength workout for beginners

I’ll keep this one simple and to the point, since that’s what you’re looking for. Mind you, this bodyweight strength workout and progressions are thought for beginners. Intermediate and advanced trainees may find a couple of ideas here, but this won’t really help you progress.

Defining a beginner

Here we will group everyone that isn’t used to bodyweight training. Why? Because there are subtle differences between weight traning and bodyweight training that include the coordination of several muscle groups and the movements in particluar. So, even though you’ll breeze through some sessions until you find your sweet spot, it’s highly recommended you start at the very beginning.

How we’ll test it

We’re going to test it through sheer number of reps. Before you start on this you’ll test yourselves in full bodyweight squats and pushups in one minute. Only good reps count, so take your time, don’t hurry up (think of going as fast as you can go in complete control). You’ll retest yourself at the end of the 6th week. Write down those numbers (both before and after).

What results can you expect?

Even though these will vary for individuals, and as far as body composition goes it will rely on your diet, you can expect some fatloss, muscle growth, conditioning and strength gains, as well as some mobility progress as well. This will depend on each individual, and the fact that you’re beginners will let you gain some of those noob gains. More experienced lifters won’t enjoy so many benefits because, well, your body is already stronger. Of course, your reps will go up, if anything, through sheer practice.

How to do it

This bodyweight strength workout is performed in a circuit. Meaning you’ll perform one exercise right after you finish the one before. After each circuit you’ll rest 2-3 minutes.

Reps: keep them low, 3 to 6, never over 8.

Sets: keep them mid to high, 3 to 5.

Frequency: as often as you like, at least 3x a week, but feel free to go up to 5 if you can take it!

Progression

You’ll be performing exercises until they stop working for you. Basically, once you hit the 10 rep mark in easier exercises it’s safe to start with 3 reps of the next in order of difficulty. Squats, at the beginning, you’ll be doing up until the 20 rep mark. Why? Because I said so. This will vary between individuals, sometimes you’ll have to work longer on a particular progression, so give it time. Remember, this will work for you only if you work on it!

Do this for at least 5 weeks and deload on the 6th!

The Excercises

A Push: Choose one STEP from this list. Start with something that’s challenging enough to let you do 5 quality reps for

The squat. A must in any bodyweight strength workout

The squat. A must in any bodyweight strength workout

one set.

A Pull: Choose one STEP from this list. Start with something that challenges you as the previous.

A Squat: Choose one STEP from this list. Here, start with something that challenges you to get 10 reps.

A Core: You’ll start at Bent Leg raises until you hit 15 reps for 3 sets. Then you’ll go to lying straight leg raises and then you’ll go to hanging knee raises. Change the exercise once you hit 3 sets of 15 reps. Once you manage that start working on Hanging leg raises.

After you finish those exercises you’ll do 5 sets of 1 minute work with 30 seconds rest of one animal form. Choose between bear crawlsape (my favorite animal form, it’s just plain fun!) and crab walks. Take it easy on them; they are more challenging than they let on.

The Bodyweight Strength Workout in a Nutshell

You’ll do:

  1. A test of pushups and squats. Take down how many reps you can do correctly in a minute (on the first week).
  2. A push + A pull + A squat + a leg for 5 circuits, resting 2 minutes between circuits. Keep it challenging.
  3. You’ll finish with some animal form travelling for 1 minute work with 30 second rests.
  4. Cool down with static stretching.
  5. During the sixth week you’ll do half of the reps per set that you were doing.
  6. At the end of the 6th week you’ll retest yourself. Then you’ll put how many reps you managed in the comment section below!

Now get to work!

Motus Virtute

PS: share with us how you did with it!

4 steps to pull-up mastery – how to do a pull up

The pull-up, few exercises have had more written about it, fewer still command the awe of its harder brethren or those who master the higher ends of its reps. An exercise so taxing, that even women, who go through the pain of birth giving, shudder to think about it, and many a physical-man works its way around it.

Getting real, there are probably very few exercises that command the respect of the pull-up. And with good reason: it’s one of the more complete exercises for the upper body. As Dan John said, he’s yet to see someone who can effectively do 20 pull-ups who cannot blast through any core challenge. I’ve even heard it named “the upper body squat”.

The only drawback with the pull-up is that, achieving only one may be deemed as an unfathomable challenge. But it is a beast you must master. So, here are 10 pull-ups variations that will teach you how to do a pull up. Bear in mind that all of these will take time.

How to do a pull up: Progressions

Step 1: Vertical pulls and hangs

Vertical pulls: This is a beautiful exercise that will teach you how to pull with your back, if you do it correctly. To start grab onto a sturdy vertical structure (pole, doors, doorframe, ledge), your hands should be at shoulder level. Place your feed level (or as level as they can) with your hands. Shift your bodyweight slightly back, extending your arms until they are straight. From here pull yourself back to starting position. Remember to pull your shoulder blades together and pull with your back (not your arms!).

how to do a pull up step 1

This wiill start building your strength in your whole back and arms. Photo taken from videos of Francesco Vaccaro of Dragon flow yoga

Hang: just as the name implies, grab onto a pull-up bar and hang for time. Keep your shoulder blades together. Aim for a minute or so. Prepare for sore forearms

how to do a pull up step 1.2

Practice. You may feel a slight discomfort on your hands. That means your getting stronger.

Step 2: Australian pull-ups and pull-up holds

These exercises will keep you a longer time than you’ll wish. But they’re solid and great to build a base of strength in your pulling.

Pull-up Holds: find a bar and jump to the top of the pull-up position and hold it. Aim for a whole minute (it’s longer than you imagine).

how to do a pull up step 2.2

When you think you’re done, hold for a bit longer.

Australian pull-ups: find a bar or a sturdy surface about hip high. Lay yourself under it and grab it with your arms (they should be straight and shoulder width at least). Now, keeping your straight body pull yourself up until your chest touches the bar/edge of the surface. Hold it for a second and gently straighten your arms. Repeat.


Step 3: Assisted pull-ups and pull-up negatives

Pull-up negatives: this one should get you there on its own. Jump up to the top of the pull-up position and straighten your arms slowly (and by slowly I mean snail pace). Try to do it for 4-8 seconds.

how to do a pull up step 3.2

Feel that stretch!

Assisted pull-ups (called jackknife pull-ups in Convict Conditioning): Grab onto the pull-up bar and find something to hold your feet at hip height. From that awkward position, pull yourself up until your chin clears the bar. This position will help you use some leg strength to aid you in the movement.

how to do a pull up step 3

Use your legs less and less as you get stronger. Eventually you won’t need them at all.

Step 4: The pull-up

Grab onto the bar with straight arms and pull yourself up until your chin clears the bar, pause, and straighten yourself back. Now practice, a lot.

how to do a pull up

Remember to keep practicing. Now hang and give me 10!

There, you’ve made it. Congratulations! Feel awesome; you’re now in the top half of the world. Now work on your pull-ups as often and fresh as possible and you’ll be pulling double digits in no time!

And that’s how to do a pull up from zero to hero. In a couple of weeks I’ll be posting on going beyond the pull-up to harder variations. Right now, if pull-ups feel too easy, add weight.

Motus Virtute

PS: If you liked this post and want to keep updated on all cool things we’ll be posting, sign up and recieve all updates in your e-mail!

An evil Easter workout challenge

Now that easter is here, and most of us are going to do one thing: Binge, and binge on chocolate (I’ll also suggest a good Stout beer to help it go down ;)). So, what can we do about our all out festivity?

Chocolate, Stout.... Together!?!?! Best easter egg EVER!

Chocolate, Stout…. Together!?!?! Best easter egg EVER!

If you haven’t watched lent and restricted you intake (you bad bad person you), you’ll have to earn your meal. So here we go

Evil easter workout challenge

You’ll be doing 6 ladders (one for every week of lent).

5 Burpees

Animal walk

1 Pull-up

5 hanging leg raises

Animal walk

How to do it

On the first ladder you’ll climb up your pull-ups. Up to 10.

On the second ladder you’ll climb your burpees, by two, up to 25.

On the third ladder, you’ll climb your HLRs, by two as well, up to 25.

Then you’ll repeat.

Test your fitness with a workout challenge anywhere and everywhere

Be an animal, be beast!. Photo by Andrew West

You’ll pick two spots, at least 5 meters (around 20 feet), one for your burpees and one with the bar. Pick whatever animal form you want (there’s hundreds to pick, so have fun!) to travel from one point to the other (this is your rest).

If you cannot get to the top rung in the ladder (10 for pull-ups for example), you’re done for the ladder and continue with the next!

Record your time and let us know how you do! This workout challenge will make you miserable for sure, so share the pain!

Motus Virtute

7 reasons why you’ll fail at the gym (or home) – and (a few) resources to succeed

I’ll go straight to the point. And no, you were not wrong, only mislead and probably not doing the research you should’ve.

Not having a clear goal

Lift your hand if you’re training for “General Fitness”. Now, please define what general fitness is. Is it being stronger? Is it being leaner? Is it having bulging hulk like muscles? Is it being able to perform a split? Define what you mean by “General Fitness” before you even approach a gym’s door or start surfing the internet for the greatest routine ever.

This post may help you in defining your goals.


Not eating right

I don’t care how much you do, how often, how big, or whatever, if you eat like crap you’ll fail, you’ll get frustrated and

Eat a right, varied and well adjusted diet to get the most out of your efforts! Photo by epSos.de

Eat a right, varied and well-adjusted diet to get the most out of your efforts! Photo by epSos.de

eventually you’ll quit.

Personally, I’ve always been pig-headed and said no to eating well. Of course, thinking back, I would’ve probably gained a lot more taking care of something that’s simple. It what you need, not what you want. Want a (1) cheat meal? Fucking earn it.

Not training for strength

Want to build muscle mass? Get stronger first. Want to get leaner? Clean your diet and get stronger. Want more endurance? Get stronger first. More power? I think you get the point.

Unless you’re doing something very sport specific, strength training should be your go to module always. It’ll bring the best results overall. Mix in some MetCon after it if you still have the energy (you should)

Not being consistent

I’ve said enough about this, and there’s a lot on the matter all over the internet and books. Pick something and stick to it for 10-12 weeks, a bare minimum of 6. Then, please tell us about this magic you’ve experienced.

Doing too much or too little

Both sides of the coin are bad. Why? You do too much, you won’t be able to do as long, you’ll get injured, you’ll regress in

Doing too much will leave you depleted. Photo by Henti Smith

Doing too much will leave you depleted. Photo by Henti Smith

your training (true story). Doing too little will hamper your results since you won’t be eliciting a muscle response. Want the less of two evils? Go for too little (seriously).

This by no means should be taken as DO NOT PRACTICE EVERYDAY!

Second Step: Building your workout – is an older post of mine that may prove of help here.

Variety (probably your kryptonite)

Variety is a big problem. You’ll end up doing (probably) too much for each muscle group and not really going anywhere. You want to keep it simple. 5 exercises, 10 at most, TOTAL. Switch them during your training week and, read the post at the end of the last item (basically, the more you practice a certain movement the better and stronger you’ll get at it). Just keep your selection finite.

As a point I’m going to say that right now I’m not following my own advise. I’ve divided my movements into technique practice and strength practice. Eventually those techniques will be solid enough to become strength training in and of itself.

Failing regularly

Simply don’t go to failure on a regular basis. You still want to? Keep it to your last set of the week for a particular exercise. You’ll thank me later.

Resources that will keep you in the right path

Me: Yes, shameless self advertising. But, if you’re not yet following my blog I invite you to start 😉

Dan John: If he wrote it, then it’s right. Dan John said it should be enough in the world of strength training. This other link will get you to many other articles by him

Nerd Fitness: you probably heard of it. It’s a great site with a shitload of information. Never a dull read.

Start Bodyweight: Great resource for bodyweight enthusiasts

Breaking muscle: There’s a bit of everything here. A lot of material. I’m particularly fond of Andrew Read’s material (endurance athlete and coach. But could teach most strength trainers a lot).


If there are other Resources, blogs, etc. you’ll like to share, please do! All information is welcome!


Don’t forget to follow this blog!

Motus Virtute

10 steps to your first Pistol Squat

The bodyweight squat is almost magic in its benefits. It builds strength, endurance, power, bone density, balance, stability, it will strengthen your core, your flexibility, and not even mentioning what it will do to your ass and legs aesthetically. And the king of bodyweight squats: the pistol squat. Beautiful in its execution, this exercise will make you physically better all around.

Now, there’s many ways to build to the pistol. What I’m sharing right now is what’s helped me make the quickest and best progress. This is not, by any means, the only way (I just think it’s the best way).

Step 1: Jackknife Squats

This is taken directly from Convict Conditioning. Get a sturdy chair, or surface that’s up to knee height. Stand directly in front of it with your feet around hip width (play with this and find what’s more comfortable with you). Place your hands on the surface keeping your back straight. From there, bend your knees dropping between your legs. Once you can’t go down any further hold for a second, and then get back to the starting position. Repeat.

Under no circumstances should your heels leave the ground. This goes for every other step as well.

First step towards the pistol squat

Go slow. Keep your back straightish. Don’t let your heels leave the ground

Step 2: Supported Squats

For supported squats you’re going to hold onto a taller surface, while standing straight up. Keeping your feet around hip width and your back straight up, you’ll bend your knees and drop down as far as you can. On the bottom, pause for a second and then stand back up following the same movement. Repeat as needed.

Second step towards the pistol squat

Once again, grab a surface and get your ass to your calves

Step 3: Half Squats

Now you’ll be flying solo little bird. Stand up straight with your feet at least hip wide. Bending at the knee and hip go until your upper thigh gets parallel to the ground. Hold that position for a second and stand back up.

The third step to the pistol squat

Now you’ll be self supported. Imagine you’re sitting down before you pop back up.

Step 4: Full squats

Do the same as you did for half squats, but go all the way down, and pause a second on the bottom of the position. Repeat as necessary.

Half way to the pistol squat

Now you’ll go on your own all the way down. Congrats, you’re half way there!

Step 5: Narrow stance squats

Now we’ll be starting to challenge your balance.

Stand straight with your feet together. Now, slowly (so as to not lose your balance) bend at the hip and knees and go down until your ass rests on your calves. Hold there for a second and stand back up.

Fifth step to the pistol squat

Ladies, this will give you an ass to be remembered by

Steps 6, 7 & 8: Partial pistol squat

Now we’re starting to go unilateral. This step is best combined with any of those that have been done before so as not to lose your flexibility.

Find a chair or surface. I’ll let you decide what height is correct for you right now. Just remember to have it challenging, and, as you master a certain range of motion, add some. Stand with your back to the chair or surface. Lift one leg from the ground and slowly bend at the hip and knee of your grounded leg. Sit on the chair, hold it for a second, and reverse the movement.

Steps 7 and 8 are exactly the same, but on lower surfaces.

A small tip: shift your weight forward; it will help you keep your balance.

Either add reps or range of motion, never both on the same practice.

Partial pistol squat

Go slow now. It’s a lot different than going to legged.

Step 9: Supported pistol squat

(This works great along Step 8)

Grab onto a sturdy vertical surface (door frames kick ass for this). Lift one leg from the ground. Grabbing onto the door frame, bend at the knee and hip slowly on the grounded leg until your glutes kiss your calf. Hold it and reverse.

Almost at the pistol squat

Ease into it, full ROM does feel fine. Try to rely less and less on your hands, but on your balance.

Step 10: The Pistol Squat Proper.

Stand up straight and lift one leg from the ground. Now bend at your hip and knee while keeping your foot flat on the ground (you did remember to never lift your heel), until you can rest on your calf and reverse. Expect to fall some until you find your balance sweet spot, if this is still too hard, grab a small weight (2kg at most), it will help you with your balance.

The pistol squat

Now, this is might not be beautifully executed. But you get the idea.

Practice your pistol squat until you become as adept as a flamingo. Seriously, this exercise will help you with any of your fitness goals, knee health, flexibility, balance and strength. Expect future variations to come.

I hope this progression helps you. If there’s anything that you may need please let us know

Motus Virtute