Tag Archives: bodyweight strength workout

How to workout for busy people – strength focus

On this second post of the How to workout for busy people series I want to focus on developing strength on a “time-budget”. Part one here

Strength = skill = practice

Why is strength so effective to develop when tight in time? Because strength is a skill. It’s the skill of building tension in the muscles, and every skill gets better the more we practice (of course, practice correct form, cues, etc.). If we tone it down, if you want to press more you’ll have to press more. If you practice more while well rested you’ll get a lot better a lot quicker.

Minimal approach works best

If you’re short on time you don’t want (or can’t) be in the gym, or your garage for long periods of time. So pick 2 to 4 exercises total. And practice them, really nail them down. Take this forced focus to get the most out of these exercises.

So, what’s the recepie for busy people anyway?

You’ll go to a HFT type of work. High frequency and intensity, with low volume (remember, a little every day goes a long way). Pick 2-4 exercises and practice them 3-5 times a week, and do 2-3 sets of 3-6 reps. The more you practice them, the better the results we’ll be at the end.

So, here are a couple of suggestions:

Barbell

Over head press (strict): 2 x 5 with a load you can manage 7 reps solidly. Rest 2-3 minutes between sets. Add weight after every second session that you nail the 2×5.

Deadlift: Same. 2×5 with a load you can manage 7 reps solidly. Rest 2-3 minutes between sets, adding weight after every second session that you nail the 2×5.

Squats: Follow the same protocol. Squats should be alternated with deadlifts (one session each) if you’re going to do them.

You can never go wrong working on the deadlift. Probably THE most complete excercise and importante exercise for busy people

You can never go wrong working on the deadlift. Probably THE most complete excercise and importante exercise for busy people. Photo by Amber Karnes

Kettlebells

A1) TGU: 2 x 1, 2, 3, 4, 5 reps. Start with 2 x 1, 2, 3 and add one rung to the ladder every second session you manage the alloted number of rungs.

A2) Goblet Squat: 2 x 1, 2, 3, 4, 5 reps. Start with 2 x 1, 2, 3 and add one rung to the ladder every second session you manage the alloted nmber of reps.

Go back and forth between this two resting as needed.

B1) Kettlebel Swings: 50-100 reps total. Keep it easy and don’t exhaust yourself with this. It’s just to finish up!
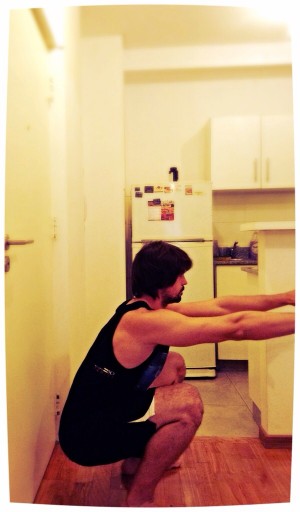
Bodyweight

Push up variant or Dip: 2 x 5

Pull-up or Row: 2 x 5

Squat: 2 x 10

Leg Raises: 1 x 10

Do this in a circuit fashion. Rest 2 minutes between circuits. And do these exercises like you mean it. Once you feel they’re two easy try a new, hard variant.

Now, that you’re not busy enough, what’s your excuse?

Motus Virtute

Bodyweight strength workout for beginners

I’ll keep this one simple and to the point, since that’s what you’re looking for. Mind you, this bodyweight strength workout and progressions are thought for beginners. Intermediate and advanced trainees may find a couple of ideas here, but this won’t really help you progress.

Defining a beginner

Here we will group everyone that isn’t used to bodyweight training. Why? Because there are subtle differences between weight traning and bodyweight training that include the coordination of several muscle groups and the movements in particluar. So, even though you’ll breeze through some sessions until you find your sweet spot, it’s highly recommended you start at the very beginning.

How we’ll test it

We’re going to test it through sheer number of reps. Before you start on this you’ll test yourselves in full bodyweight squats and pushups in one minute. Only good reps count, so take your time, don’t hurry up (think of going as fast as you can go in complete control). You’ll retest yourself at the end of the 6th week. Write down those numbers (both before and after).

What results can you expect?

Even though these will vary for individuals, and as far as body composition goes it will rely on your diet, you can expect some fatloss, muscle growth, conditioning and strength gains, as well as some mobility progress as well. This will depend on each individual, and the fact that you’re beginners will let you gain some of those noob gains. More experienced lifters won’t enjoy so many benefits because, well, your body is already stronger. Of course, your reps will go up, if anything, through sheer practice.

How to do it

This bodyweight strength workout is performed in a circuit. Meaning you’ll perform one exercise right after you finish the one before. After each circuit you’ll rest 2-3 minutes.

Reps: keep them low, 3 to 6, never over 8.

Sets: keep them mid to high, 3 to 5.

Frequency: as often as you like, at least 3x a week, but feel free to go up to 5 if you can take it!

Progression

You’ll be performing exercises until they stop working for you. Basically, once you hit the 10 rep mark in easier exercises it’s safe to start with 3 reps of the next in order of difficulty. Squats, at the beginning, you’ll be doing up until the 20 rep mark. Why? Because I said so. This will vary between individuals, sometimes you’ll have to work longer on a particular progression, so give it time. Remember, this will work for you only if you work on it!

Do this for at least 5 weeks and deload on the 6th!

The Excercises

A Push: Choose one STEP from this list. Start with something that’s challenging enough to let you do 5 quality reps for

The squat. A must in any bodyweight strength workout

The squat. A must in any bodyweight strength workout

one set.

A Pull: Choose one STEP from this list. Start with something that challenges you as the previous.

A Squat: Choose one STEP from this list. Here, start with something that challenges you to get 10 reps.

A Core: You’ll start at Bent Leg raises until you hit 15 reps for 3 sets. Then you’ll go to lying straight leg raises and then you’ll go to hanging knee raises. Change the exercise once you hit 3 sets of 15 reps. Once you manage that start working on Hanging leg raises.

After you finish those exercises you’ll do 5 sets of 1 minute work with 30 seconds rest of one animal form. Choose between bear crawlsape (my favorite animal form, it’s just plain fun!) and crab walks. Take it easy on them; they are more challenging than they let on.

The Bodyweight Strength Workout in a Nutshell

You’ll do:

  1. A test of pushups and squats. Take down how many reps you can do correctly in a minute (on the first week).
  2. A push + A pull + A squat + a leg for 5 circuits, resting 2 minutes between circuits. Keep it challenging.
  3. You’ll finish with some animal form travelling for 1 minute work with 30 second rests.
  4. Cool down with static stretching.
  5. During the sixth week you’ll do half of the reps per set that you were doing.
  6. At the end of the 6th week you’ll retest yourself. Then you’ll put how many reps you managed in the comment section below!

Now get to work!

Motus Virtute

PS: share with us how you did with it!

4 steps to pull-up mastery – how to do a pull up

The pull-up, few exercises have had more written about it, fewer still command the awe of its harder brethren or those who master the higher ends of its reps. An exercise so taxing, that even women, who go through the pain of birth giving, shudder to think about it, and many a physical-man works its way around it.

Getting real, there are probably very few exercises that command the respect of the pull-up. And with good reason: it’s one of the more complete exercises for the upper body. As Dan John said, he’s yet to see someone who can effectively do 20 pull-ups who cannot blast through any core challenge. I’ve even heard it named “the upper body squat”.

The only drawback with the pull-up is that, achieving only one may be deemed as an unfathomable challenge. But it is a beast you must master. So, here are 10 pull-ups variations that will teach you how to do a pull up. Bear in mind that all of these will take time.

How to do a pull up: Progressions

Step 1: Vertical pulls and hangs

Vertical pulls: This is a beautiful exercise that will teach you how to pull with your back, if you do it correctly. To start grab onto a sturdy vertical structure (pole, doors, doorframe, ledge), your hands should be at shoulder level. Place your feed level (or as level as they can) with your hands. Shift your bodyweight slightly back, extending your arms until they are straight. From here pull yourself back to starting position. Remember to pull your shoulder blades together and pull with your back (not your arms!).

how to do a pull up step 1

This wiill start building your strength in your whole back and arms. Photo taken from videos of Francesco Vaccaro of Dragon flow yoga

Hang: just as the name implies, grab onto a pull-up bar and hang for time. Keep your shoulder blades together. Aim for a minute or so. Prepare for sore forearms

how to do a pull up step 1.2

Practice. You may feel a slight discomfort on your hands. That means your getting stronger.

Step 2: Australian pull-ups and pull-up holds

These exercises will keep you a longer time than you’ll wish. But they’re solid and great to build a base of strength in your pulling.

Pull-up Holds: find a bar and jump to the top of the pull-up position and hold it. Aim for a whole minute (it’s longer than you imagine).

how to do a pull up step 2.2

When you think you’re done, hold for a bit longer.

Australian pull-ups: find a bar or a sturdy surface about hip high. Lay yourself under it and grab it with your arms (they should be straight and shoulder width at least). Now, keeping your straight body pull yourself up until your chest touches the bar/edge of the surface. Hold it for a second and gently straighten your arms. Repeat.


Step 3: Assisted pull-ups and pull-up negatives

Pull-up negatives: this one should get you there on its own. Jump up to the top of the pull-up position and straighten your arms slowly (and by slowly I mean snail pace). Try to do it for 4-8 seconds.

how to do a pull up step 3.2

Feel that stretch!

Assisted pull-ups (called jackknife pull-ups in Convict Conditioning): Grab onto the pull-up bar and find something to hold your feet at hip height. From that awkward position, pull yourself up until your chin clears the bar. This position will help you use some leg strength to aid you in the movement.

how to do a pull up step 3

Use your legs less and less as you get stronger. Eventually you won’t need them at all.

Step 4: The pull-up

Grab onto the bar with straight arms and pull yourself up until your chin clears the bar, pause, and straighten yourself back. Now practice, a lot.

how to do a pull up

Remember to keep practicing. Now hang and give me 10!

There, you’ve made it. Congratulations! Feel awesome; you’re now in the top half of the world. Now work on your pull-ups as often and fresh as possible and you’ll be pulling double digits in no time!

And that’s how to do a pull up from zero to hero. In a couple of weeks I’ll be posting on going beyond the pull-up to harder variations. Right now, if pull-ups feel too easy, add weight.

Motus Virtute

PS: If you liked this post and want to keep updated on all cool things we’ll be posting, sign up and recieve all updates in your e-mail!

10 steps to your first Pistol Squat

The bodyweight squat is almost magic in its benefits. It builds strength, endurance, power, bone density, balance, stability, it will strengthen your core, your flexibility, and not even mentioning what it will do to your ass and legs aesthetically. And the king of bodyweight squats: the pistol squat. Beautiful in its execution, this exercise will make you physically better all around.

Now, there’s many ways to build to the pistol. What I’m sharing right now is what’s helped me make the quickest and best progress. This is not, by any means, the only way (I just think it’s the best way).

Step 1: Jackknife Squats

This is taken directly from Convict Conditioning. Get a sturdy chair, or surface that’s up to knee height. Stand directly in front of it with your feet around hip width (play with this and find what’s more comfortable with you). Place your hands on the surface keeping your back straight. From there, bend your knees dropping between your legs. Once you can’t go down any further hold for a second, and then get back to the starting position. Repeat.

Under no circumstances should your heels leave the ground. This goes for every other step as well.

First step towards the pistol squat

Go slow. Keep your back straightish. Don’t let your heels leave the ground

Step 2: Supported Squats

For supported squats you’re going to hold onto a taller surface, while standing straight up. Keeping your feet around hip width and your back straight up, you’ll bend your knees and drop down as far as you can. On the bottom, pause for a second and then stand back up following the same movement. Repeat as needed.

Second step towards the pistol squat

Once again, grab a surface and get your ass to your calves

Step 3: Half Squats

Now you’ll be flying solo little bird. Stand up straight with your feet at least hip wide. Bending at the knee and hip go until your upper thigh gets parallel to the ground. Hold that position for a second and stand back up.

The third step to the pistol squat

Now you’ll be self supported. Imagine you’re sitting down before you pop back up.

Step 4: Full squats

Do the same as you did for half squats, but go all the way down, and pause a second on the bottom of the position. Repeat as necessary.

Half way to the pistol squat

Now you’ll go on your own all the way down. Congrats, you’re half way there!

Step 5: Narrow stance squats

Now we’ll be starting to challenge your balance.

Stand straight with your feet together. Now, slowly (so as to not lose your balance) bend at the hip and knees and go down until your ass rests on your calves. Hold there for a second and stand back up.

Fifth step to the pistol squat

Ladies, this will give you an ass to be remembered by

Steps 6, 7 & 8: Partial pistol squat

Now we’re starting to go unilateral. This step is best combined with any of those that have been done before so as not to lose your flexibility.

Find a chair or surface. I’ll let you decide what height is correct for you right now. Just remember to have it challenging, and, as you master a certain range of motion, add some. Stand with your back to the chair or surface. Lift one leg from the ground and slowly bend at the hip and knee of your grounded leg. Sit on the chair, hold it for a second, and reverse the movement.

Steps 7 and 8 are exactly the same, but on lower surfaces.

A small tip: shift your weight forward; it will help you keep your balance.

Either add reps or range of motion, never both on the same practice.

Partial pistol squat

Go slow now. It’s a lot different than going to legged.

Step 9: Supported pistol squat

(This works great along Step 8)

Grab onto a sturdy vertical surface (door frames kick ass for this). Lift one leg from the ground. Grabbing onto the door frame, bend at the knee and hip slowly on the grounded leg until your glutes kiss your calf. Hold it and reverse.

Almost at the pistol squat

Ease into it, full ROM does feel fine. Try to rely less and less on your hands, but on your balance.

Step 10: The Pistol Squat Proper.

Stand up straight and lift one leg from the ground. Now bend at your hip and knee while keeping your foot flat on the ground (you did remember to never lift your heel), until you can rest on your calf and reverse. Expect to fall some until you find your balance sweet spot, if this is still too hard, grab a small weight (2kg at most), it will help you with your balance.

The pistol squat

Now, this is might not be beautifully executed. But you get the idea.

Practice your pistol squat until you become as adept as a flamingo. Seriously, this exercise will help you with any of your fitness goals, knee health, flexibility, balance and strength. Expect future variations to come.

I hope this progression helps you. If there’s anything that you may need please let us know

Motus Virtute