Tag Archives: bodyweight training

How to workout for busy people – Conditioning focus

This is part 3 of the How to workout for busy people series (click here for Part 1 and Part 2), in which we’ll focus on conditioning.

Different types of Conditioning

Yes, there are different types. But, for practical purposes let’s focus on long sessions and short sessions. To build an all

Long distance running, conditioning, endurance. Not the best for busy people, but necessary

Steady state for long sessions will get you the desired results. Be them bodycomposition, endurance or recuperating ability

around conditioned body, you’ll have to do BOTH. Since time is an issue in this series, we’ll try to be as efficient as possible.

Training in long sessions will be focused on steady state cardio. I know, I must be from a different day and age if I believe this to be necessary (and you’re busy people, how dare I?). But if you think that it’s ineffective as conditioning (we’re not talking fatloss) then you have a different thing coming. Doing over 90 minutes in a row will not only improve your conditioning and endurance, but will also vastly improve your mental toughness and body composition (there, I said it).

Short duration training is where HIIT will work best. There are literally thousands of routines scattered all over the web. It’s effective, efficient and to the point, which is what busy people are all about. It will be simple, not easy.

Frequency

This one you should be playing by ear, I’d love to say you’ll have to do X amount a week, but truth be told, this workouts should leave you gassed. But I still advocate for higher frequency. So, if you plan on doing 15 minutes per session, think about going 5 times a week with short duration workouts, and once a week for long sessions. I recommend doing 30 minutes of HIIT and 90 minutes of steady state workouts.

The recommended prescription is 3 HIITs + 1 steady state workouts per week.

The Busy People Workouts

I’ll put 3 protocols for you to follow. Even though most modalities can be adapted to them, I’ll put what I found to be the best to apply it.

On the top of every minute

Choose 1 or 2 exercises (that complement each other), and set a timer to announce the start of every minute. You’ll be doing a fixed set and rest what remains of the minute.

Progress: Every time you hit the amount of reps, add 1 to every set. Once you start getting only 20 seconds of rest, choose a harder variation or add weight.

Recommended: Kettlebell swings, snatches, bodyweight squats.

As Many Rounds As Possible

This popularized by Crossfit method is as effective and brutal as they come.

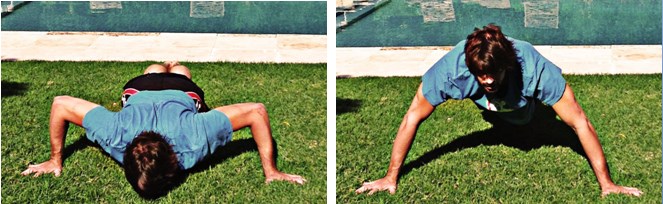
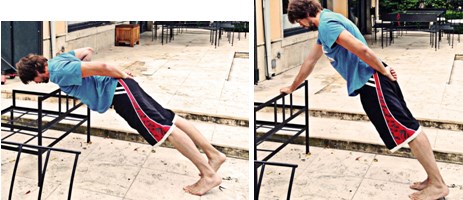
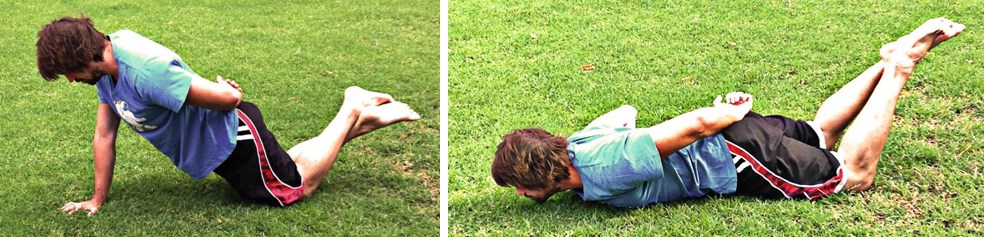
Pick a sequence of exercises that will cover your bases (a push, a pull, a hip hinge, a squat, a core). Set a timer for the allotted time and do between 3 and 5 reps per exercise. You’ll keep going through the circuit until the time finishes.

Progress: Take note of how many circuits you finished. Next time you’ll have to do more.

Recommended: Bodyweight exercises and Kettlebells will probably go a longer way. Pick variations/weights you can do 10 reps with and do 5 per set.

Sprint ladders

Effective as hell but they will beat you. Choose 3 different distances (30m, 60m, 100m (that’s meters)). You’ll sprint the first distance, return jogging to the start line; run the second distance, jog back to the beginning; sprint the third, walk back to the beginning and start over. Do this 5 times. You’ll feel amazing after it (well, maybe not directly after it, it may take some recovery).

Progress: just add ladders, or go by rungs. Ideally you’ll always go balls out and progress will be slow.

You may switch this for kb snatches or swings.

Kettlebell swing, conditioning, full body. Great for busy people

Kettlebell swings are probably one of the best conditioning exercises out there.

Long sessions.

Feel free to keep this as optional, and if needed do it on the weekend. Do 90 minutes of whatever you enjoy the most. Keep it light and keep it constant. Don’t stop before the 90 minutes are up.

What? No tabatas?

No. Hell no. What most people know as Tabatas are a watered down, bullshit ridden imitation of the protocol. There’s four reasons why I don’t put them here:

  1. The tabata protocol calls for 20 seconds of intense, balls to the wall, execution, and 10 seconds of active rest with lighter movement (like jogging is to sprints). Please tell me how you’re managing that with squats. I thought so.
  2. Chances are that, with the exception of sprinting, kettlebells (and I doubt most people can manage it) and a fixed bicycle, you won’t be able to go all out for twenty seconds.
  3. If you seriously can go more than one full out tabata workout, congratulations, you’re better off than probably 90% of the planet. But, doing “tabata pushups”, “tabata pull-ups”, “tabata squats” and “tabata crunches”(I did puke  little bit there), you should be an all star athlete. Seriously.
  4. Most people can’t really handle it. If you can do the tabata protocol (realistic ones, sprint or bikes) then go for it. Chances are you can’t.

No go beat yourself up!

Next one I’ll be discussing on how to get both strong and conditioned for busy people. But chances are you already know how!

Motus Virtute

Why use kettlebells and 2 workouts

Far from still being the underground turned culty fitness tool that it was half a decade ago, KBs have come into the mainstream. There’s a lot said about how and when to use this tool, and their apparant benefits. All this aside, what I’m happiest about is, I no longer have to describe a cannonball with a handle, most everyone knows what it is.

Why use Kettlebells

The kettlebell is, in my opinion, one of the best tools out there for overall fitness for the everyday Joe and Jane. Kettlebells can and will help you develop

  • Strength: this are the grinding movements

    Kettlebell clean, kettlebell military press, strength training with kettlebells

    Clean the kettlebell strongly, else you’ll bang up your forearm! – Photo by Ken Liu

  • Conditioning: through repetitive ballistics
  • Flexibility: if used wisely
  • Power: Through heavy ballistic excercises
  • Mobility: think windmills and TGUs.

Are they the best tools for each job. Hell no. But they’re good for the development of an all around athlete/enthusiast. And, they’re very easily integrated with other tools.

(I could get into more detail about the advantages of practicing the hip drive or how all these attributes can be trained. But that’s a subject for a book, and not a blog post)

Disadvantages of kettlebells (why not use kettlebells)

They’re not a specialist’s tool. If you want to be the strongest or the most powerful, you can’t beat a barbell. You want to be the most flexible, yoga is your tool. You want to be the best at anything, there are appropiate tools that will let you specialize in each: endurance, flexibility, mobility, strength, hyperthorphy… All can be improved with a KB, but no to the same level as.

So, Why use kettlebells then?

Kettlebells will give you a blend of strength, endurance and power that can’t really be described as “strength-endurance” or “power-endurance” but more as an: ease of being. Having practiced on and off with kettlebells (sometimes my goals are more specialized) I can attest to the fact that any regular task gets easier (like playing football(or soccer) for about two hours with legs that just won’t quit), that joint health increases, and that the grass gets even greener (ok, maybe not that much).

In other words, unless you’re focused on a particular sport, kettlebells are probably the right tool for you.

The Workouts

1) KB solo

This an beginner to intermidiate plan and should be done 3 or 4 times a week. Please keep your recovery in mind. It has an all around focus (if you want to go more frequent, change the number of sets to 3). Don’t ever go to failure!

A1) TGU 3×3

Rest 1-2 minutes between sets. Go heavy, but never to failure.

B1) Clean + Military Press 5×5

B2) KB one arm row 5×5

Rest one minute between each excercise

Kettlebell swing

Expect a healthy sweat! Photo by John Calnan

C1) Goblet Squat 5×5-10

C2) Heavy KB 1H Swings or Snatches 5×5

Rest one minute between each excercise.

D1) Kettlebell 2H swings 5x 15-20

Rest 30″ to 1 minute between sets. Jog in place or jump an imaginary rope.

After this have a cool down with stretches and some mobility work for recovery.

2) KB + Bodyweight

This is an all arounder that will hit each and every movement pattern in the most effective way I know of. Do this 4 times a week.

Day 1

A) TGU 3×3 (can’t beat this baby)

Go heavy. But never to failure. Rest one or two minutes between sets.

B1) KB Clean + Press 5×5

B2) Pullup progression 5×5 (pick one you can do up to 8 reps barely). If this is your pull-up, weight them!

Rest 1 minute between excercises

C1) Goblet Squat 5×5

C2) 1H heavy swings 5×5

Rest one minute between excercises.

D1) Burpees 5x as much as you can with perfect form (I don’t care about speed here, just go as fast as you can while remaining as controlled as you can).

Day 2

A) Handstand holds 3x 50% of your max holding time.

Keep your body straight (or better yet, face the wall and touch it with your chest). Rest one or two minutes between each set.

B1) Push-up progression (or dips) 5×5

B2) KB Row 5×5

Rest 1 minute between each set

C1) Pistol Squat progression 5×5 (use a progression you can do about 8 perfect reps, but not 9)

C2) KB Snatch or 1H heavy swing 5×5

Rest 1 minute between each set

D1) Kettlebell 2H swing 5x as many as you can with perfect form and a solid hip drive.

After you finish each workout, cool down with some stretches and mobility work for recovery.

Conclusion

If you can use them, Kettlebells are a great addition to any fitness program, just be mindful of what your goals are and what you’re looking for. If you want to be a specialist, then the KB is probably not your cuppa. If, on the other hand, you’re looking for all around development to above average, but not elite levels, then by all means, go buy the damned thing!

Shameless advertising bit – where I learned most of kettlebells from

Why use kettlebells

One of the best damn books to get you started, and then some

To finish this post off I’d like to share with you where I learned most kettlebell skills and probably the most important book to have in a kettlebell library. The Russian Kettlebell Challenge (affiliate link). by Pavel Tsatsouline is a golden oldie. Even though there have been several other great books by the same author (Enter the Kettlebell and Simple & Sinister to say the least) this one I believe is the most complete of the three, the only lacking part I found is: there’s no information on the TGU (which later became a staple in both his certifications, and an exercise that one must simply do).

*Note: all the above links are from affiliate programs and will lead you either to Dragondoor or Amazon product pages. Just FYI.

Motus Virtute

5 reasons your workout should match your lifestyle

Fitness writers, whether they are professionals or amateurs (such as me), enthusiasts or internet gurus, have been telling people how to train, and why they should workout the way they/we say in complete disregard to their lifestyle. To add more to the confusion, they’ll not only tell you how to train, but will offer a myriad of exercises that can (and should) take your brain into meltdown.

I’m calling bullshit.

I do, even though I tell people how they should train as well, giving them ample reasons as to why. Is this wrong? Not necessarily. Are you going to fail reaching your goals? Probably not. Why? Most things will and should work, as long as you know what and why you’re doing them and you keep all other things in context.

Why your workout should meet your lifestyle

1. You’ll have fun

I think this is self explained. You’re not a pro, and seriously, doing something that enriches your life should not be a chore (unless prescribed by a doctor. Health professionals trump everything). Your workout should be challenging, fun and motivating.

Bottom line: your life’s probably hard enough without adding crap. Do something that makes you happy!

2. It’s a personal thing

Skateboard, fun workout, personal workout, relax

Yep, definetly needs grip work!!
Photo by Raul Gomez

Your goals are your own. And you should train to achieve them, you shouldn’t train to achieve what someone else says your goals should be. We may help you design goals in a way that are clear (example: you should define what being fitter means. To you it may mean running 25k in record time, it may mean to jog for 1 hour straight), and help you build towards them.

Bottom line: If you want to look better, GO FOR IT, it’s a completely legit aspiration. Personally, I’ll be getting stronger instead.

3. It will make you consistent

You should be looking forward to your workout. If it feels you with dread or boredom, it won’t be long until you start making excuses not to show up. If there’s anything I learned from my father regarding training is this: THE BEST PROGRAM IS THE ONE YOU’LL ACTUALLY DO (to which I add: in the long run).

Bottom line: enjoying your training will make you look forward to it. Not enjoying it will make you quit

4. It will connect you with like-minded people

As you get better and more exposed to an activity, chances are bigger that you’ll meet like-minded individuals that will motivate you even further. If, for example, I start talking about bouldering to a swimmer, 10 to 1 says he’ll be looking at me with glazed eyes feeling somewhat bored. If I talk about bouldering to a climber, chances are we’ll exchange ideas, tips, and maybe even go bouldering or climbing together at one time or another.

Bottom line: there’s probably many people doing what you enjoy. Joining them will compound results!

5. You’ll have fun

I said this already but it bears repeating. If you’re not enjoying yourself, you won’t be doing it for long.

In a nutshell

There you go, 5 solid reasons why your workouts should match your lifestyle. Train what you enjoy, have fun, and be happy. Chances are there’s enough bull around for you to waste time doing more on purpose.

Now I’m going to go back to suggesting what you should do.

Motus Virtute

Bodyweight strength workout for beginners

I’ll keep this one simple and to the point, since that’s what you’re looking for. Mind you, this bodyweight strength workout and progressions are thought for beginners. Intermediate and advanced trainees may find a couple of ideas here, but this won’t really help you progress.

Defining a beginner

Here we will group everyone that isn’t used to bodyweight training. Why? Because there are subtle differences between weight traning and bodyweight training that include the coordination of several muscle groups and the movements in particluar. So, even though you’ll breeze through some sessions until you find your sweet spot, it’s highly recommended you start at the very beginning.

How we’ll test it

We’re going to test it through sheer number of reps. Before you start on this you’ll test yourselves in full bodyweight squats and pushups in one minute. Only good reps count, so take your time, don’t hurry up (think of going as fast as you can go in complete control). You’ll retest yourself at the end of the 6th week. Write down those numbers (both before and after).

What results can you expect?

Even though these will vary for individuals, and as far as body composition goes it will rely on your diet, you can expect some fatloss, muscle growth, conditioning and strength gains, as well as some mobility progress as well. This will depend on each individual, and the fact that you’re beginners will let you gain some of those noob gains. More experienced lifters won’t enjoy so many benefits because, well, your body is already stronger. Of course, your reps will go up, if anything, through sheer practice.

How to do it

This bodyweight strength workout is performed in a circuit. Meaning you’ll perform one exercise right after you finish the one before. After each circuit you’ll rest 2-3 minutes.

Reps: keep them low, 3 to 6, never over 8.

Sets: keep them mid to high, 3 to 5.

Frequency: as often as you like, at least 3x a week, but feel free to go up to 5 if you can take it!

Progression

You’ll be performing exercises until they stop working for you. Basically, once you hit the 10 rep mark in easier exercises it’s safe to start with 3 reps of the next in order of difficulty. Squats, at the beginning, you’ll be doing up until the 20 rep mark. Why? Because I said so. This will vary between individuals, sometimes you’ll have to work longer on a particular progression, so give it time. Remember, this will work for you only if you work on it!

Do this for at least 5 weeks and deload on the 6th!

The Excercises

A Push: Choose one STEP from this list. Start with something that’s challenging enough to let you do 5 quality reps for

The squat. A must in any bodyweight strength workout

The squat. A must in any bodyweight strength workout

one set.

A Pull: Choose one STEP from this list. Start with something that challenges you as the previous.

A Squat: Choose one STEP from this list. Here, start with something that challenges you to get 10 reps.

A Core: You’ll start at Bent Leg raises until you hit 15 reps for 3 sets. Then you’ll go to lying straight leg raises and then you’ll go to hanging knee raises. Change the exercise once you hit 3 sets of 15 reps. Once you manage that start working on Hanging leg raises.

After you finish those exercises you’ll do 5 sets of 1 minute work with 30 seconds rest of one animal form. Choose between bear crawlsape (my favorite animal form, it’s just plain fun!) and crab walks. Take it easy on them; they are more challenging than they let on.

The Bodyweight Strength Workout in a Nutshell

You’ll do:

  1. A test of pushups and squats. Take down how many reps you can do correctly in a minute (on the first week).
  2. A push + A pull + A squat + a leg for 5 circuits, resting 2 minutes between circuits. Keep it challenging.
  3. You’ll finish with some animal form travelling for 1 minute work with 30 second rests.
  4. Cool down with static stretching.
  5. During the sixth week you’ll do half of the reps per set that you were doing.
  6. At the end of the 6th week you’ll retest yourself. Then you’ll put how many reps you managed in the comment section below!

Now get to work!

Motus Virtute

PS: share with us how you did with it!

4 steps to pull-up mastery – how to do a pull up

The pull-up, few exercises have had more written about it, fewer still command the awe of its harder brethren or those who master the higher ends of its reps. An exercise so taxing, that even women, who go through the pain of birth giving, shudder to think about it, and many a physical-man works its way around it.

Getting real, there are probably very few exercises that command the respect of the pull-up. And with good reason: it’s one of the more complete exercises for the upper body. As Dan John said, he’s yet to see someone who can effectively do 20 pull-ups who cannot blast through any core challenge. I’ve even heard it named “the upper body squat”.

The only drawback with the pull-up is that, achieving only one may be deemed as an unfathomable challenge. But it is a beast you must master. So, here are 10 pull-ups variations that will teach you how to do a pull up. Bear in mind that all of these will take time.

How to do a pull up: Progressions

Step 1: Vertical pulls and hangs

Vertical pulls: This is a beautiful exercise that will teach you how to pull with your back, if you do it correctly. To start grab onto a sturdy vertical structure (pole, doors, doorframe, ledge), your hands should be at shoulder level. Place your feed level (or as level as they can) with your hands. Shift your bodyweight slightly back, extending your arms until they are straight. From here pull yourself back to starting position. Remember to pull your shoulder blades together and pull with your back (not your arms!).

how to do a pull up step 1

This wiill start building your strength in your whole back and arms. Photo taken from videos of Francesco Vaccaro of Dragon flow yoga

Hang: just as the name implies, grab onto a pull-up bar and hang for time. Keep your shoulder blades together. Aim for a minute or so. Prepare for sore forearms

how to do a pull up step 1.2

Practice. You may feel a slight discomfort on your hands. That means your getting stronger.

Step 2: Australian pull-ups and pull-up holds

These exercises will keep you a longer time than you’ll wish. But they’re solid and great to build a base of strength in your pulling.

Pull-up Holds: find a bar and jump to the top of the pull-up position and hold it. Aim for a whole minute (it’s longer than you imagine).

how to do a pull up step 2.2

When you think you’re done, hold for a bit longer.

Australian pull-ups: find a bar or a sturdy surface about hip high. Lay yourself under it and grab it with your arms (they should be straight and shoulder width at least). Now, keeping your straight body pull yourself up until your chest touches the bar/edge of the surface. Hold it for a second and gently straighten your arms. Repeat.


Step 3: Assisted pull-ups and pull-up negatives

Pull-up negatives: this one should get you there on its own. Jump up to the top of the pull-up position and straighten your arms slowly (and by slowly I mean snail pace). Try to do it for 4-8 seconds.

how to do a pull up step 3.2

Feel that stretch!

Assisted pull-ups (called jackknife pull-ups in Convict Conditioning): Grab onto the pull-up bar and find something to hold your feet at hip height. From that awkward position, pull yourself up until your chin clears the bar. This position will help you use some leg strength to aid you in the movement.

how to do a pull up step 3

Use your legs less and less as you get stronger. Eventually you won’t need them at all.

Step 4: The pull-up

Grab onto the bar with straight arms and pull yourself up until your chin clears the bar, pause, and straighten yourself back. Now practice, a lot.

how to do a pull up

Remember to keep practicing. Now hang and give me 10!

There, you’ve made it. Congratulations! Feel awesome; you’re now in the top half of the world. Now work on your pull-ups as often and fresh as possible and you’ll be pulling double digits in no time!

And that’s how to do a pull up from zero to hero. In a couple of weeks I’ll be posting on going beyond the pull-up to harder variations. Right now, if pull-ups feel too easy, add weight.

Motus Virtute

PS: If you liked this post and want to keep updated on all cool things we’ll be posting, sign up and recieve all updates in your e-mail!

An evil Easter workout challenge

Now that easter is here, and most of us are going to do one thing: Binge, and binge on chocolate (I’ll also suggest a good Stout beer to help it go down ;)). So, what can we do about our all out festivity?

Chocolate, Stout.... Together!?!?! Best easter egg EVER!

Chocolate, Stout…. Together!?!?! Best easter egg EVER!

If you haven’t watched lent and restricted you intake (you bad bad person you), you’ll have to earn your meal. So here we go

Evil easter workout challenge

You’ll be doing 6 ladders (one for every week of lent).

5 Burpees

Animal walk

1 Pull-up

5 hanging leg raises

Animal walk

How to do it

On the first ladder you’ll climb up your pull-ups. Up to 10.

On the second ladder you’ll climb your burpees, by two, up to 25.

On the third ladder, you’ll climb your HLRs, by two as well, up to 25.

Then you’ll repeat.

Test your fitness with a workout challenge anywhere and everywhere

Be an animal, be beast!. Photo by Andrew West

You’ll pick two spots, at least 5 meters (around 20 feet), one for your burpees and one with the bar. Pick whatever animal form you want (there’s hundreds to pick, so have fun!) to travel from one point to the other (this is your rest).

If you cannot get to the top rung in the ladder (10 for pull-ups for example), you’re done for the ladder and continue with the next!

Record your time and let us know how you do! This workout challenge will make you miserable for sure, so share the pain!

Motus Virtute

7 reasons why you’ll fail at the gym (or home) – and (a few) resources to succeed

I’ll go straight to the point. And no, you were not wrong, only mislead and probably not doing the research you should’ve.

Not having a clear goal

Lift your hand if you’re training for “General Fitness”. Now, please define what general fitness is. Is it being stronger? Is it being leaner? Is it having bulging hulk like muscles? Is it being able to perform a split? Define what you mean by “General Fitness” before you even approach a gym’s door or start surfing the internet for the greatest routine ever.

This post may help you in defining your goals.


Not eating right

I don’t care how much you do, how often, how big, or whatever, if you eat like crap you’ll fail, you’ll get frustrated and

Eat a right, varied and well adjusted diet to get the most out of your efforts! Photo by epSos.de

Eat a right, varied and well-adjusted diet to get the most out of your efforts! Photo by epSos.de

eventually you’ll quit.

Personally, I’ve always been pig-headed and said no to eating well. Of course, thinking back, I would’ve probably gained a lot more taking care of something that’s simple. It what you need, not what you want. Want a (1) cheat meal? Fucking earn it.

Not training for strength

Want to build muscle mass? Get stronger first. Want to get leaner? Clean your diet and get stronger. Want more endurance? Get stronger first. More power? I think you get the point.

Unless you’re doing something very sport specific, strength training should be your go to module always. It’ll bring the best results overall. Mix in some MetCon after it if you still have the energy (you should)

Not being consistent

I’ve said enough about this, and there’s a lot on the matter all over the internet and books. Pick something and stick to it for 10-12 weeks, a bare minimum of 6. Then, please tell us about this magic you’ve experienced.

Doing too much or too little

Both sides of the coin are bad. Why? You do too much, you won’t be able to do as long, you’ll get injured, you’ll regress in

Doing too much will leave you depleted. Photo by Henti Smith

Doing too much will leave you depleted. Photo by Henti Smith

your training (true story). Doing too little will hamper your results since you won’t be eliciting a muscle response. Want the less of two evils? Go for too little (seriously).

This by no means should be taken as DO NOT PRACTICE EVERYDAY!

Second Step: Building your workout – is an older post of mine that may prove of help here.

Variety (probably your kryptonite)

Variety is a big problem. You’ll end up doing (probably) too much for each muscle group and not really going anywhere. You want to keep it simple. 5 exercises, 10 at most, TOTAL. Switch them during your training week and, read the post at the end of the last item (basically, the more you practice a certain movement the better and stronger you’ll get at it). Just keep your selection finite.

As a point I’m going to say that right now I’m not following my own advise. I’ve divided my movements into technique practice and strength practice. Eventually those techniques will be solid enough to become strength training in and of itself.

Failing regularly

Simply don’t go to failure on a regular basis. You still want to? Keep it to your last set of the week for a particular exercise. You’ll thank me later.

Resources that will keep you in the right path

Me: Yes, shameless self advertising. But, if you’re not yet following my blog I invite you to start 😉

Dan John: If he wrote it, then it’s right. Dan John said it should be enough in the world of strength training. This other link will get you to many other articles by him

Nerd Fitness: you probably heard of it. It’s a great site with a shitload of information. Never a dull read.

Start Bodyweight: Great resource for bodyweight enthusiasts

Breaking muscle: There’s a bit of everything here. A lot of material. I’m particularly fond of Andrew Read’s material (endurance athlete and coach. But could teach most strength trainers a lot).


If there are other Resources, blogs, etc. you’ll like to share, please do! All information is welcome!


Don’t forget to follow this blog!

Motus Virtute

Train like a videogame character

I’ve always been a huge fan of video games. The more I’ve played, the more I’ve enjoyed myself. Fighting games and RPGs once had total control over my life, I even remember once there was an epic battle between a complete stranger and me on MARVEL SUPER HEROES VS CAPCOM that ended in a complete draw. I still love video games. In our fitness pursuit, video games have something to teach us. If you want to be like Link, Scorpion or the Dovakiin, you should train like a videogame character.

Lessons Learned

The mission

In video games, our characters have a mission, a huge mission that define their whole lives, or at least, their whole goal in the game (in Mortal Kombat I you prove you’re the toughest fighter, in MKII you save the world, in most RPGs you both save the world and or the universe). To reach this goal, they have to take on smaller quests and milestones: you beat other combatants, monsters, etc. So what’s the lesson here?

You should have a main, big goal: save the world, be the best.

To achieve it, you should focus on different milestones: deadlift x2 your bodyweight, have a 30 seconds free handstand.

You catch my drift.

Leveling up

Every game has the same pattern: they get more difficult as you advance, so, in kind, you must get better in order to win.

Train like a videogame character and defeat the big bad boss

Thank god you brought your swords. Final Fantasy X belongs to Square Enix

Your opponents are faster, stronger and more resilient.

This translates exactly to your training, whether it is bodyweight (going after more complex and harder exercises) or with weights (going heavier, longer, with lower rest periods). Bottom line is: you’ve got to have a challenge yourself if you want to progress.

Choose your weapons

This is the most beautiful part. Your game character has a low amount of movements.

In Street Fighter you have 3 kicks and 3 punches (that only vary in intensity) and one or two special moves. In RPGs, you’re usually running or fighting, and for fights, you usually have between one and three moves, done over and over again until eventually you level up, when you do you either get stronger or you learn a new skill (in more complex games you’ll have to master some moves to learn specific ones).

Bottom line: restrict the amount of exercises you perform if you want to make real gains. Usually, one per movement pattern should get you in the clear (this post should take you in the right direction, but it’s the bare minimum). Use your common sense, choose those that’ll help you achieve your main goal (see title number one up here).

What to take from all this

When you’re creating your character, you should take all of these aspects into account. Or better yet, fill this list:

  1. What’s your main quest: list your longer term goals:
  2. Give us 3 milestones or shorter term goals that you’ll need to achieve before you save the world (ie: beat Goro/compete in a 1 mile race)
  3. How many moves will your character perform, and how often? You may want to choose weak, medium and strong movements of the same pattern (like Street Fighter).

Now go forth hero, and save the world (or kick Shang Tsung’s ass).

high level

Motus Virtute

If you’ve liked this post and want to keep reading our awesomish material, subscribe to our blog!

Burn baby Burn

Summer is a beautiful season. Light of clothes and with longer days, many grow self conscious about their looks (ridiculous, I know, since most of

how to lose weight is simple, just needs work

As little fat as possible. Photo by Laurent Jean Philippe

you’ve been working out all through the year!). Magic diets and even more magical workout programs appear in magazines, blogs, etc.

I hate this trend. I’ll help you loos the weight you don’t want, but believe me, the biggest thing you’ll feel is a sense of accomplishment. Good fat burinning workouts are hard and tough. There’s no magic about them, only sweat. So, if this isn’t what you’re looking for, please click on the next Trainers hate this guy link you come across. Now, If you’re looking to burn fat for the summer, there are 2 key things you’ll have to get in order:

Diet

You can’t beat the dinner table. No matter how hard you try, it’ll always beat you back. So get your diet in order or you won’t be losing weight. Almost every piece of literature I’ve read on this give two main tips:

Have caloric deficit of 10-20% (You’ll need to calculate your basic caloric need for this). You’ll have to burn more than you eat in order to lose weight

Count calories weekly, not daily. It’ll make it easier.

Anyway, I’m not a nutrition expert so I’m not really qualified to help. But here are a couple of links I’ve found helpful.

The Right Way to Lose Fat: What You Eat (Breaking Muscle)

Exercise (insert evil laugh).

Here I will be helping you. How? I’ll workout for you… not! I’ll be offering 2 different approaches that will help lose weight without changing too much of your regular workouts. But please bear in mind. Fatloss is mostly achieved on a meal to meal basis.

The everyday blaster

This is one of the simplest protocols, and it complements your workouts and practices (they do not substitute). We’ll basically grab a compound exercise and practice it every day for a set number of reps. Make sure you make it challenging enough to work, but not as hard enough that you cannot do your regular workouts.

The 300 swings a day. This idea is from Pat Flynn from Chronicles of Strength, so full props to him. The idea is simple. Grab your kettlebell every day and swing it 300 times.

Now if you don’t have a kettlebell, don’t worry: burpees will put a blowtorch to your fat. Build up to 100 burpees a day and you’ll be golden.

http://www.youtube.com/watch?v=TX60BcsO_wE

Try jumping as high as you can

The finisher

Finishers are a great way to add burners to your strength practice. What’s the best finisher I’ve ever used? The sprint ladder. Sprint ladders are

how to lose weight? sprint

Run as fast as you can. Keep nothing in the tank

easy to understand, but do not underestimate them. You’ll need a small stretch of road/land/something

and mark 3 sets of distance (I usually do 30m, 60m and 100m, though the last one seldom looks like a sprint). Now, from the start line, you’ll sprint to your first mark, jog back to the start, sprint to the second mark, jog back to the start, sprint to the last line, and WALK back. Do this either for time or a set number of sets (5 works magic). Make sure you post your hate comments later. I like doing them on a hill.

A more civilized way of doing this (but not as effective nor adrenaline producing) is to do a short density set after your workout. Kb swings, kb snatches, burpees or high rep squats work wonders. You’ll set a timer to 10 minutes and do a set on the top of every minute. Once you can complete all 10 minutes with a given number of reps, add more reps. Try to keep 15 seconds of rest as a minimum (now’s when you add weight ;9)

Closing comments

Losing weight is a challenge best attacked head on. You don’t need to change your strength training to achieve it, in fact, I even discourage it. But it does take hard work and a focused will. This two suggestions will help you get there just remember that it’s mostly on a diet base that weight lose is really achieved. Enjoy and share your progress with us!

Note: following this suggestions may result in the following secondary effects: a higher level of conditioning and feeling of true awesomeness as bonus.

Motus Virtute

10 steps to the one arm push-up

The push-up has been a staple of strength and bodyweight control since the dawn of man, and not for lack of reason. The push-up will work most of your body, especially once you start going on to harder versions of this classic exercise.

This post is to show you how to go from zero to hero on your push-ups. I’ve built this one arm pushup tutorial from several places and my own experience on what has worked for me and others for the quickest, safest way to learn the One Arm Push-Up.

Play the progressions by ear. As a rule, on the first two steps once you can do 2 sets of 20 proper reps, you should be able to start on the next step. Try not to advance until you can do at least 3 perfect, solid reps on the level you wish to work.

Just remember, for these to work you’ll have to work at them! Be smart and challenge yourself.

Step 0: Wall push-ups + Elbow plank

I’m calling this step cero since I believe it should only be taken on by absolute sedentary, someone who hasn’t done any type of physical activity in a long time.

Elbow plank: Place your elbows straight under your shoulders and on the ground, your legs behind you. Hold your body in a straight line crushing your core and tensing your legs and buttocks. Remember your back should be flat, your tailbone in, your stomach tensed and your legs locked and firm.

Elbow plank

Wall Push-ups: To perform this exercise stand at arm’s length from a wall, feet together and your hands on the wall at shoulder width and height. From there bend your arms and go towards the wall, touching it with your forehead. Feet stay put during the whole movement and your hips and back should be straight. Reverse the movement from there.wall pushups

Step 1: Incline push-ups + Plank

Plank: Hold your body in the push-up position really crushing your core and tensing your legs and buttocks. Remember your back should be flat, your tailbone in, your stomach tensed and your legs locked and firm, as well as your elbows.

Full plank

Incline Push-up: place your hands on an elevated surface around hip height (shoulder width). Your body should be at 45º angle with the floor while your arms are straight. Feet together. From there bend your arm until your chest touches the surface, after that, press powerfully (and controlled) back into extended position.

incline pushup

Step 2: Kneeling push-ups

Kneeling push-ups: lie on the ground and place your hands under your shoulders, and bend your knees at 90 degrees. Keeping your knees together, press firmly with your hands until your arms are straight. That’s the beginning position. From there bend your arms until your chest touches the floor and press back up again.

knee pushup

Step 3: Push-ups

Place your hands beneath the shoulders on the ground (or any flat surface) and keep your body straight, your feet should be together (at most, hip distance). Keeping your plank bend your arm until your chest touches the floor. From there push the floor away with determination until your arms are straight again. Always keep your plank alignment.

Pushup

Step 4: Diamond push-ups and wide push-ups

Diamond push-ups: Place your hands beneath your chest as close as possible (think of your index and thumbs touching their opposites). From there, keeping your plank, bend your arms until your chest touches the back of your hand. From there press away from them in strength. Always keep your plank alignment. This movement has a stronger triceps involvement.

diamond pushup

Wide Push-ups: kind of the opposite, go wider than shoulder width (I like trying to keep my elbow at 90 degrees while in the lower position). From there once again, while keeping your plank, bend your arm until your chest touches the ground. Then push on the ground strongly. This move has a stronger pec involvement.

Wide pushup

Step 5: Decline Push-ups

Place your feet on a stable object (about knee height at least) and get into push-up position. Slowly bend your arm until your forehead touches the floor, and then reverse the movement. Keep your plank at all times.

decline pushups

Step 6: uneven push-ups

Get one hand on an unstable object (think basketball), the other on the ground and go into push-up position (note that one of your arms will be bent). Bend your arms until your elevated hand and shoulder touch (or as close as you can. DO NOT FORCE THE JOINTS). Reverse the movement. Don’t twist (keep your shoulders square) and always keep your plank (One will get straight; the other will be always bent).

uneven push ups

Step 7: Wall one arm push-up and one arm plank

Now things will start getting a lot more fun. Always remember to keep your plank and avoid twisting as much as you can. Your shoulders should remain square throughout all the movement.

One arm Plank: just as the plank but with only one arm holding you. It’s a balance challenge. Remember to keep your shoulders square and don’t twist.

OAPlank

Start arm distance against a wall. Place one hand on it, and keeping your plank bend the arm until your forehead touches the wall, then reverse the movement. Repeat on your other arm.

wall onearm pushup

Step 8: incline one arm push-up

The same as Step 1 but with just one arm. Remember to keep your plank and your shoulders square (don’t twist). Your legs should not be more than hip width apart.

1 arm incline pushup

Step 9: one arm knee push-up

Same as Step 2 but with one arm. Remember to keep tight.

one arm knee pushup

Step 10: one arm push-up

There you go, the OAPU and bragging right to go with it. Get into pushup position and lift one arm. Bend your arm until your chest touches the floor and then reverse the movement. Always keep your plank and your shoulders square. Twisting should be kept to a minimum, and strive to keep your feet no more than hip width apart!

one arm pushup

Coming soon: Progressing from the OAPU, what’s next?

So, where are you so far on your push-up training? Share with us and, if you have any experiential information to share with us please do!

If you know someone that’s been struggling with progressing on his push-ups share this article with him!